Creating Your First Feed
Step-by-step guide to setting up your first data feed from bank accounts to Google Sheets, Notion, or Airtable.
5 min read
On this page
Once you've connected a bank and an integration, you're ready to create your first feed. A feed defines one flow of data: which accounts it reads from, which integration it writes to, how fields map to columns, and how often it runs. This guide walks you through the four setup steps.
Prerequisites

The Four Setup Steps#
The feed editor has an Overview tab plus four configuration tabs, one per step. Your progress is automatically saved as you go, so you can leave and come back any time.
1. Sources
Select bank accounts to pull data from
2. Destination
Choose which integration receives the data
3. Mapping
Map data fields to columns
4. Schedule
Set up automatic syncing (optional)
Step 1: Sources#
In the Sources tab, select which bank accounts you want to pull data from.
Selecting Your Accounts
Browse your connected banks
Your connected banks are listed with their accounts underneath. Each account shows its type as a badge (Checking, Savings, Credit Card, etc.).
Check the accounts to include
Click the checkboxes next to accounts you want in this feed. You can select accounts from multiple banks in one feed.
Choose the feed type
Each feed carries one data type. The type is auto-detected based on your accounts, but you can change it.
Transactions
Individual transaction records
Balances
Account balance snapshots
Trades
Investment transactions
Holdings
Portfolio positions
Loans (liability balances) and Orders (open brokerage orders) are also available as feed types when your selected accounts support them. One feed carries exactly one data type, so create separate feeds to sync, say, transactions and balances from the same accounts.
Account Type Restriction
Step 2: Destination#
In the Destination tab, choose which integration receives the data, then pick the exact place inside it.
Google Sheets#
Select a spreadsheet
Choose from spreadsheets in your connected Google account.
Choose a sheet
Select the specific sheet within the spreadsheet.Set header row
Specify which row contains your column headers (default: row 1).
Choose direction and position
Select by row (most common) or by column, and whether to add data at the beginning or end.
Notion#
Select a workspace
Choose from workspaces shared with BankSync.Choose a database
Select the database where data will be added.
Share the database with the BankSync connection
Airtable#
Select a base
Choose from bases in your connected Airtable account.Choose a table
Select the table within the base.
Quick Add
Step 3: Mapping#
In the Mapping tab, map your bank data fields to the columns in your sheet or table using drag-and-drop.
Available Transaction Fields#
ID
Unique transaction identifier
Date
Transaction date
Description
Merchant or transaction name
Credit Amount
Money coming in
Debit Amount
Money going out
Category
Transaction category
Type
Transaction type
Bank
Source bank name
Account
Account name
How to Map Fields#
Drag and drop to reorder
Arrange fields in your preferred order by dragging them in the mapping list.
Pick a column for each field
Use the dropdown next to each field to map it to a column in your sheet or table.
Remove unwanted fields
Click the X button to remove fields you don't need.Add additional fields
Drag fields from the available pool to add them to your mapping.
For the full mapping reference, including Auto fill, see Configuring Field Mappings.
Balance Sync Mode#
When syncing balances, choose how data should be handled:
Append
Adds a new timestamped row each sync, building balance history over time
Overwrite
Updates the same rows in place, keeping only the current state (for dashboards)
Step 4: Schedule (Optional)#
In the Schedule tab, set up automatic syncing on a recurring schedule. This step is optional; you can always run feeds manually.
Hourly
Run about once an hour
Daily
Run every day at a set time
Weekly
Run on a specific day of the week
Manual
No schedule; run only when you click Sync Now
Time Zone and Plan Gating
Confirm your setup#
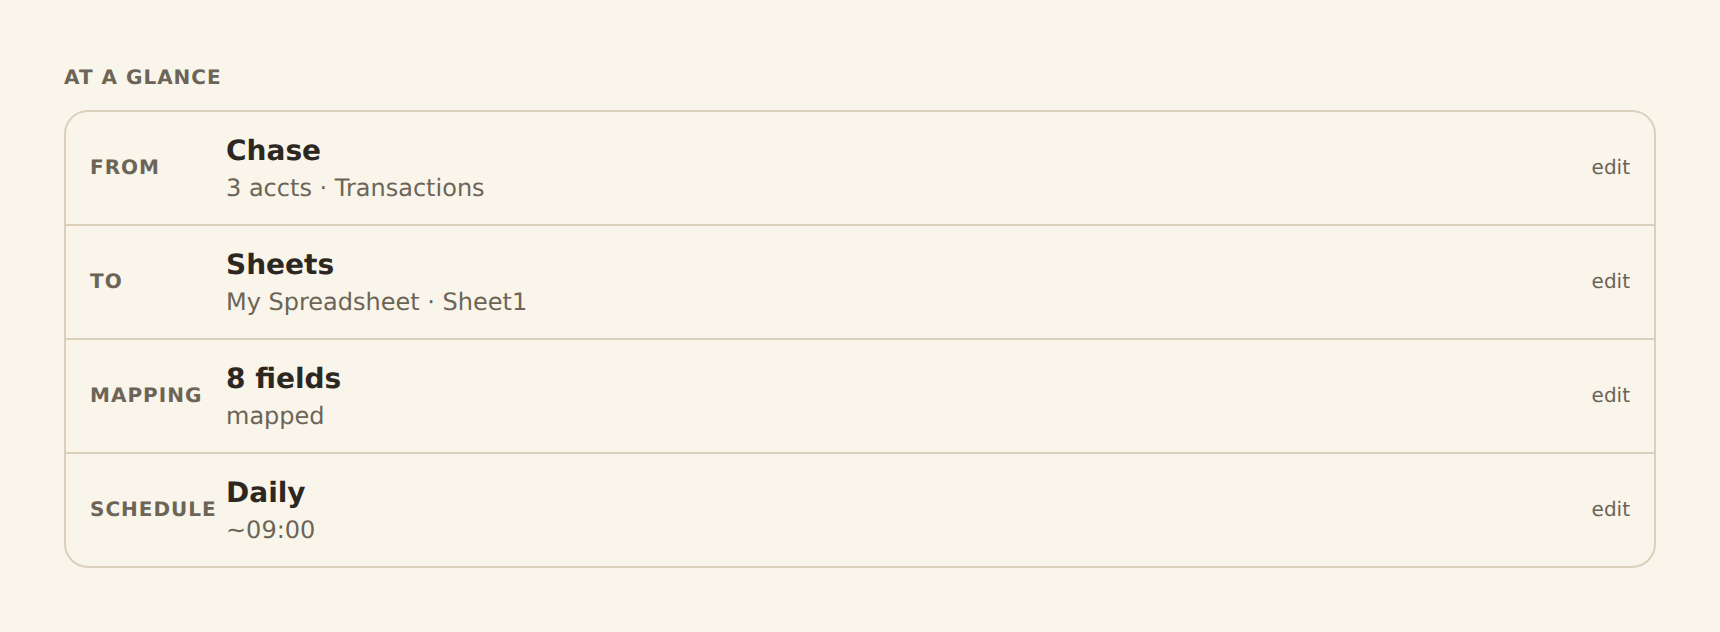
When all four steps are done, the feed editor's At a glance panel summarizes the feed. Every row (From, To, Mapping, Schedule) should show a real value, not "Not configured". If a row still says "Configure", open that tab and finish it.
Running Your Feed#
Once configured, click your feed card in the Feeds tab and then "Run" to start syncing data.
Run Options#
Incremental (Default)
Fetches only what's new since your last sync. BankSync tracks progress per account so nothing is missed or duplicated.
Start from the beginning
An optional checkbox in the Sync Now dialog that re-fetches all available data from scratch. Use it sparingly: re-syncing data that was already written can create duplicate rows.
Manual runs use the same read path and deduplication as scheduled syncs, so running "Sync Now" alongside a schedule never creates duplicates.
Monitoring Progress#
- Click "History" to see all sync jobs (past and in-progress)
- Job status updates in real-time: Created → In Progress → Completed
- View error details if a sync fails, with remediation suggestions
Pro Tips
Related guides#
- Configuring Field Mappings: everything about the Mapping tab, including Auto fill
- Setting Up Scheduled Feeds: cadences, local-time scheduling, and plan gating
- Managing Your Feeds: editing, running, and monitoring feeds after setup
- Managing Integrations: connect and maintain the integrations feeds write to
Managing your feeds
Use this page with your AI assistant
Every BankSync doc is available as plain Markdown for agents and LLMs.